Rowing Machine HIIT: High-Intensity Interval for Quick Results

mistressesanonymous.com – High-Intensity Interval Training (HIIT) has gained immense popularity due to its ability to deliver quick and effective results. When combined with a rowing machine, HIIT workouts can provide an incredibly efficient full-body workout that improves cardiovascular health, burns fat, and builds strength in less time. Rowing machine HIIT combines the intensity of interval training with the low-impact, full-body benefits of rowing, making it an ideal choice for anyone looking to get fit quickly and efficiently.

In this article, we will explore the benefits, structure, and best practices for incorporating HIIT into your rowing routine.

What is Rowing Machine HIIT?

The Basics of HIIT

HIIT is a training method that involves short bursts of intense activity followed by a brief rest or low-intensity recovery period. The idea is to push your body to its limits for a short period, which helps to increase your metabolic rate and burn fat long after the workout is over. Typically, HIIT sessions last between 15 and 30 minutes, making them ideal for those with busy schedules.

How Does Rowing Machine HIIT Work?

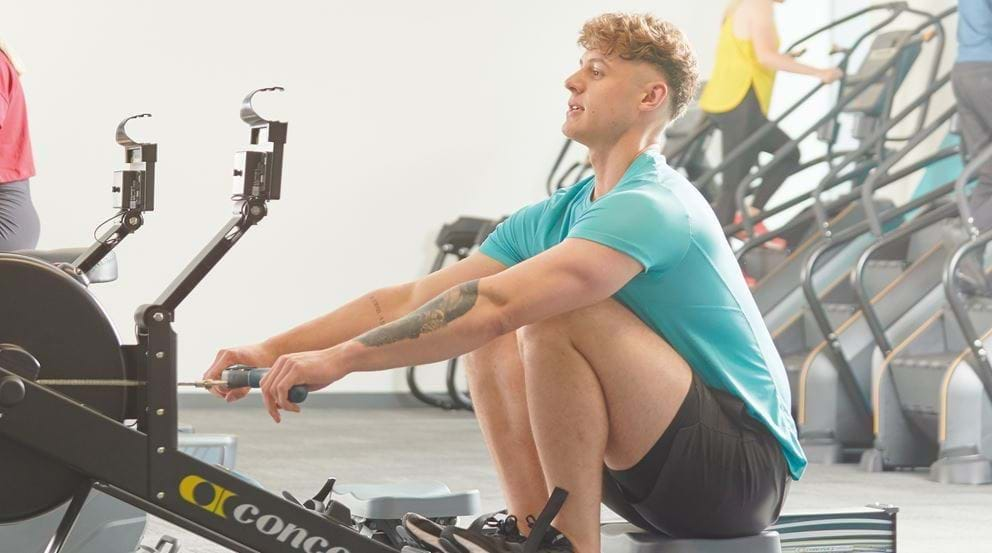
Rowing machine HIIT follows the same principles of interval training but uses the rowing machine as the main piece of equipment. A rowing machine provides a full-body workout that engages muscles in your legs, core, and arms, making it an excellent option for high-intensity intervals. During rowing machine HIIT, you alternate between intense rowing sessions and brief recovery periods, pushing your body to perform at maximum effort during the work intervals.

Rowing works through both aerobic and anaerobic systems, meaning it challenges both your cardiovascular and muscular endurance. The combination of these energy systems makes rowing machine HIIT an efficient and effective workout.

Benefits of Rowing Machine HIIT

1. Full-Body Workout

One of the most significant benefits of using a rowing machine is that it works multiple muscle groups simultaneously. Unlike traditional cardio exercises like running or cycling, which mainly engage your lower body, rowing activates your legs, core, and upper body. The motion of the rower involves pulling with your arms, pushing with your legs, and stabilizing with your core muscles. This makes rowing machine HIIT a fantastic workout for building overall strength and toning muscles.

2. Fat Burning and Weight Loss

HIIT workouts are well-known for their ability to burn fat quickly. Because rowing machine HIIT combines intense bursts of effort with periods of recovery, it keeps your body burning calories even after the workout has ended. This phenomenon is known as the “afterburn effect” or excess post-exercise oxygen consumption (EPOC). As a result, your body continues to burn fat for hours after you finish your rowing workout. If you’re looking to shed excess body fat, rowing machine HIIT can be an effective tool.

3. Improved Cardiovascular Health

Regular rowing machine HIIT sessions can significantly improve your cardiovascular health. The high-intensity intervals push your heart rate into the anaerobic zone, improving heart and lung capacity over time. Studies have shown that HIIT can increase VO2 max (the maximum amount of oxygen your body can utilize during exercise), which is a key indicator of cardiovascular fitness. By engaging in rowing machine HIIT, you’ll improve your endurance, heart health, and overall fitness.

4. Low-Impact Exercise

Unlike high-impact exercises such as running, rowing is a low-impact activity that puts less stress on your joints while still providing a full-body workout. This makes rowing machine HIIT suitable for people of all fitness levels, including those with joint issues or those looking to avoid the stress that high-impact exercises can cause. The low-impact nature of rowing helps reduce the risk of injury while still delivering powerful results.

5. Time Efficiency

One of the main appeals of HIIT, including rowing machine HIIT, is its time efficiency. Traditional workouts that focus on endurance can take longer to see results, but HIIT allows you to achieve similar (or even better) results in a fraction of the time. A typical rowing machine HIIT workout lasts between 15 to 30 minutes, making it perfect for those with tight schedules who want a quick and effective workout.

How to Structure a Rowing Machine HIIT Workout

1. Warm-Up (5 Minutes)

Before diving into a HIIT rowing session, it’s essential to prepare your body. Start with a 5-minute warm-up at a moderate pace to increase your heart rate and loosen your muscles. This could be a steady-paced row or a dynamic warm-up that includes some bodyweight movements like squats, lunges, and arm circles.

2. Choose Your Intervals

HIIT workouts typically consist of alternating between intense effort intervals and rest or low-intensity intervals. For rowing machine HIIT, aim for work intervals lasting 20 to 45 seconds, followed by a rest or active recovery period lasting 30 to 90 seconds. Your work intervals should push you to your maximum effort, where you’re working at around 85% to 90% of your maximum heart rate.

For example, you can structure your intervals as follows:

  • 30 seconds of intense rowing (rowing as fast and hard as you can)
  • 30 seconds of light rowing or rest

Repeat this cycle for 15 to 30 minutes, depending on your fitness level and the time you have available.

3. Gradually Increase Intensity

As you become more accustomed to rowing machine HIIT, you can gradually increase the intensity of your intervals. This could mean:

  • Increasing the intensity of your work intervals (row faster or harder)
  • Reducing the rest period (making the recovery phase shorter)
  • Increasing the number of rounds in your workout

Over time, this progressive overload will help you break through plateaus and continue to see improvement in strength, endurance, and fat loss.

4. Cool Down and Stretch (5 Minutes)

After completing your HIIT rowing session, it’s important to cool down to bring your heart rate back to normal. Spend 5 minutes rowing at a slow, moderate pace, followed by static stretching to target the muscles you’ve worked during the session. Focus on your hamstrings, quads, calves, back, and shoulders for a complete recovery.

Tips for Maximizing Results

1. Focus on Technique

While rowing machine HIIT is about speed and intensity, proper form is crucial. Poor technique can lead to injury and reduced efficiency. Make sure to engage your core, maintain a straight back, and drive with your legs while keeping your arms and back relaxed. Proper form ensures that you’re targeting the correct muscle groups and reduces the risk of strain.

2. Incorporate Variety

To prevent boredom and keep challenging your body, mix up your rowing machine HIIT routines. Change the duration of your intervals, adjust the resistance on the rowing machine, or try different types of intervals (e.g., Tabata-style, pyramid intervals, or EMOM – Every Minute On the Minute).

3. Monitor Your Progress

Keep track of your progress by measuring key metrics such as your rowing speed, distance, time, or heart rate. Tracking your performance over time will help you stay motivated and see improvements, which will help you push harder during each session.

Conclusion

Rowing machine HIIT is an excellent choice for anyone looking to get fit quickly. By combining the power of high-intensity interval training with the full-body benefits of rowing, you can burn fat, improve cardiovascular health, and build strength—all in a short period. Whether you’re new to fitness or looking to add variety to your routine, rowing machine HIIT can help you achieve your goals in less time while delivering amazing results. Remember to focus on technique, gradually increase intensity, and keep challenging yourself for continuous improvement.

Power Racks and Squat Racks: For Strength Training

mistressesanonymous.com – When it comes to building strength, enhancing athletic performance, and ensuring safety during heavy lifts, a power rack or squat rack is an indispensable piece of equipment. Whether you’re a beginner lifter or an advanced strength athlete, these racks provide stability, support, and versatility, enabling you to perform a wide range of exercises. In this comprehensive guide, we will dive deep into what power racks and squat racks are, their differences, benefits, types, and how to incorporate them into your workout routine.

What is a Power Rack?

A power rack, often referred to as a power cage, is a large, rectangular frame with adjustable safety bars and J-hooks designed to hold a barbell at various heights. The primary function of a power rack is to allow users to perform exercises such as squats, bench presses, deadlifts, overhead presses, and more, safely and with the ability to lift heavy weights. Power racks are equipped with adjustable safety bars or pins that catch the barbell in case the lifter cannot complete a rep, preventing injury from dropping a heavy weight.

Features of a Power Rack

  1. Adjustable Safety Bars: The safety bars or pins inside the rack provide a safeguard by catching the barbell if you fail to complete a lift. These bars can be adjusted to different heights to accommodate various exercises.

  2. J-Hooks: J-hooks are metal hooks mounted on the sides of the rack where the barbell is placed when you are setting up for exercises like squats or bench presses. They can be adjusted to different heights to match your lifting position.

  3. Open Frame Design: Power racks are typically designed with an open frame, which gives you full access to all sides of the rack. This allows you to step in and out freely while also performing exercises like deadlifts and overhead presses without any obstruction.

  4. Pull-Up Bars: Many power racks come with an integrated pull-up bar located at the top of the frame. This feature adds versatility, allowing you to perform bodyweight exercises like chin-ups and pull-ups.

  5. Sturdiness and Durability: Power racks are typically made from heavy-duty steel, which makes them extremely stable and capable of handling heavy loads. They are designed to withstand the stress of intense lifting sessions and provide a solid base for your workouts.

Benefits of a Power Rack

  1. Safety: The primary benefit of using a power rack is the safety it offers during heavy lifting. The adjustable safety bars or pins ensure that if you fail to complete a rep, the barbell won’t fall on you. This is especially important for exercises like squats and bench presses, where lifting heavy weights can put you at risk of injury if you’re unable to complete the movement.

  2. Versatility: Power racks are versatile and allow you to perform a wide variety of exercises. You can perform squats, bench presses, deadlifts, overhead presses, and even pull-ups or chin-ups with a power rack, making it a valuable addition to any strength training routine.

  3. Progressive Overload: A power rack allows for progressive overload, which is the key to building strength. The adjustable nature of the J-hooks and safety bars lets you gradually increase the weight you’re lifting while ensuring your safety.

  4. Space-Efficient: Unlike some other gym equipment that requires a large footprint, a power rack provides a compact and stable environment for a wide range of exercises. Many models also come with attachments like dip bars, weight storage, and cable pulleys, enhancing their utility.

  5. Increased Confidence: The safety and stability offered by a power rack allows lifters to push their limits confidently, knowing that they have a system in place to catch the barbell if they fail to complete a lift.

What is a Squat Rack?

A squat rack is a simpler piece of equipment compared to a power rack but still an essential tool for strength training. Squat racks are designed to hold a barbell at a height where it can be lifted off and used for squats, bench presses, and other movements. While squat racks provide stability for exercises like squats, they typically lack the full safety features of a power rack, such as adjustable safety bars.

Features of a Squat Rack

  1. Uprights: Squat racks typically consist of two vertical uprights that hold the barbell at adjustable heights. These uprights provide stability to the barbell during exercises like squats and bench presses.

  2. J-Hooks: Similar to power racks, squat racks feature J-hooks where the barbell rests when you’re setting up for a lift. These hooks can be adjusted to different heights for various exercises.

  3. Open Frame: Squat racks often have a more open design than power racks, which allows you to step in and out more easily during exercises like squats and overhead presses.

  4. Stability: Squat racks are made of heavy-duty metal to ensure that the rack can hold heavy loads while you perform squats, presses, or deadlifts.

Benefits of a Squat Rack

  1. Compact and Space-Saving: Squat racks are more compact than power racks, making them a great choice for home gyms with limited space. They typically have a smaller footprint and take up less room than a full power rack, while still allowing you to perform a variety of exercises.

  2. Ease of Use: Because squat racks are simpler than power racks, they are easier to use for basic lifts like squats, bench presses, and overhead presses. You can quickly adjust the J-hooks and load the barbell, making it a great option for lifters who want simplicity and speed in their workouts.

  3. Affordability: Squat racks are typically more affordable than power racks due to their simpler design. This makes them an excellent option for budget-conscious lifters who still want to perform heavy lifts safely.

  4. Space for Other Exercises: While squat racks are primarily used for squats and presses, their open design also allows for other exercises such as overhead presses, rows, and pull-ups. If you’re looking for a multipurpose piece of equipment but are limited on space, a squat rack is an ideal choice.

Power Rack vs. Squat Rack: Which One Should You Choose?

While both power racks and squat racks are excellent tools for strength training, the decision of which one to choose depends on your goals, experience level, and available space. Below are some factors to consider when making your decision:

1. Safety Features

If safety is your top priority, particularly if you’re lifting heavy weights, a power rack is the better option. Power racks come with safety bars or pins that catch the barbell if you fail to complete a lift, reducing the risk of injury. This is especially beneficial for exercises like squats and bench presses, where failing a lift can result in serious injury without proper safety measures.

Squat racks, on the other hand, don’t offer the same level of protection. While they provide support for lifting, they don’t have the adjustable safety bars that catch the barbell if you fail. If you’re lifting heavy on your own, a power rack is the safer choice.

2. Space Considerations

If you’re limited on space, a squat rack may be a better fit. Squat racks are more compact and take up less room than power racks, making them ideal for smaller home gyms or workout spaces. However, if you have ample room and want maximum versatility and safety, a power rack will give you more exercise options while also allowing for heavier lifts.

3. Exercise Variety

Both power racks and squat racks allow you to perform basic exercises like squats, deadlifts, and overhead presses. However, a power rack offers more versatility with integrated features like pull-up bars, dip bars, and the ability to perform bench presses with full safety. If you’re looking for a multi-functional piece of equipment that supports a wide range of exercises, a power rack is the more versatile option.

4. Budget

If you’re on a tight budget, a squat rack may be the more affordable choice. Squat racks tend to be cheaper than power racks because they are simpler in design and don’t come with as many features. If you don’t need the extra safety or versatility offered by a power rack, a squat rack can provide all the essential features for strength training at a lower cost.

How to Use a Power Rack and Squat Rack Effectively

Both power racks and squat racks are incredibly versatile, but using them correctly is crucial for safety and maximum results. Here are a few tips for using these racks effectively:

1. Proper Rack Setup

Ensure that the J-hooks are adjusted to the proper height for each exercise. For squats, the barbell should be at a height that allows you to lift it off the rack and comfortably get into the squat position. For bench presses, the barbell should be set slightly above your chest level.

2. Safety First

Always use safety bars or pins when lifting heavy. In a power rack, adjust the safety bars to a height slightly below your lowest point in the lift to catch the barbell if you fail. In a squat rack, if the rack doesn’t include safety features, it’s best to have a spotter when performing heavy lifts.

3. Keep Your Form in Check

Focus on maintaining proper form when lifting. Whether you’re performing squats, deadlifts, or bench presses, ensure that your posture and technique are correct to prevent injury and maximize the effectiveness of the exercise.

4. Gradual Progression

When using a power rack or squat rack, always aim for gradual progression. Start with lighter weights and increase the load over time as your strength improves. Progressive overload is the key to building muscle and strength safely and effectively.

Conclusion

Both power racks and squat racks are essential tools for anyone serious about strength training, providing safety, support, and versatility during heavy lifts. If you’re prioritizing safety and versatility, especially for home workouts, a power rack offers a secure environment for exercises like squats, bench presses, and overhead presses. On the other hand, if you’re looking for a more compact, budget-friendly option, a squat rack can provide all the essential features for basic lifting exercises. By understanding the differences between these two racks and considering your needs, you’ll be well-equipped to make an informed decision and enhance your training routine.